
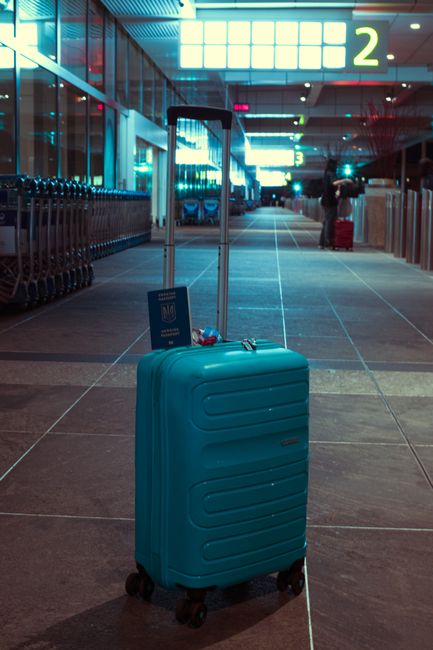
Delayed baggage can disrupt your first hours in a new country, especially when important arrival documents, medication, accommodation details, or proof of onward travel are inside the missing bag. The safest plan is to keep required originals under your personal control, store separate protected copies, retain your itinerary and baggage-tag records, and follow the airline’s applicable delayed-baggage reporting route.
Marta had been awake since the overnight flight when she reached the arrivals hall in Lisbon. She was holding her passport in one hand and a folded address note in the other. Her checked suitcase, the one containing her printed accommodation confirmation and a folder of supporting papers, never appeared on the belt.
The airline desk was already crowded. A family ahead of her was trying to describe a blue suitcase without its baggage tag. A staff member asked Marta for her boarding pass and baggage receipt. She found the boarding pass in her phone, but the receipt was buried in a message thread she had not downloaded for offline access.
For a few minutes, the situation had a serious possible outcome. If she could not report the bag properly, she might lose time searching for it, miss the point at which she planned to check in, or struggle to show the accommodation details she thought were in the suitcase. The missing bag had turned a manageable arrival into a chain of questions.
Then Marta opened a small document pouch in her personal bag. Her passport was there. So was a paper copy of her accommodation address, a screenshot of her itinerary, and a photograph of the baggage tag saved in her phone. She still needed to report the delayed suitcase through the airline, and those copies did not guarantee entry, registration, or accommodation approval. They gave her enough control to handle the next conversation accurately.
That distinction matters. A backup can help you explain your situation, find your accommodation, contact the airline, or recover a reference number. It cannot replace an entry requirement or persuade an authority to accept a document that must be presented in original form.
Keep required originals under personal control
Before leaving for the airport, identify the originals that must stay with you throughout the journey. This usually includes your passport or other travel document. Depending on your route and personal circumstances, it may also include a visa, residence document, permit, medical prescription, or another original that an authority, carrier, landlord, school, or employer may require.
The exact requirements depend on your nationality, destination, travel purpose, and current rules. Check the responsible official authority and your airline before departure. A general relocation checklist can help you organise the questions, but it cannot decide which original documents you must carry.
Place these items in a small personal bag that stays with you during check-in, security, boarding, transfers, and arrival. Avoid putting them in a checked suitcase, even if the bag is well labelled. A checked bag can be delayed, routed separately, or delivered after you have already reached the destination.
Keep the arrangement simple enough to use while tired. Your passport should not be hidden under several layers of clothing or mixed with cables and snacks. Use one secure pouch for travel-critical originals, then keep that pouch in the same personal bag every time you move.
Separate “required originals” from “useful papers.” Your accommodation booking, a printed map, a copy of your insurance details, and a list of contacts may be useful. They should not crowd the same pocket as your passport. A clear arrangement reduces the chance of handing over the wrong item or leaving something behind at a desk.
Before you leave home, check the pouch against your departure plan. At the airport, check it again before handing over your suitcase. After security, check it before boarding. On arrival, check it before leaving the baggage area. These small checks create a repeatable habit when the airport is noisy and your attention is divided.
If you are travelling with medication, ask a qualified healthcare professional or the relevant official authority about the correct way to carry it. Do not assume that a copy of a prescription, a photograph, or a pharmacy label will satisfy every destination’s rules. Keep any required original prescription or supporting document under your personal control when applicable.
The same principle applies to money and communication essentials. Carry enough payment access, a charged phone, and the information needed to reach your accommodation. A delayed bag can make a practical inconvenience much harder when your phone charger, wallet, or address is also inside it.
Create separate protected document copies
Copies are useful because they preserve information when the original is unavailable, misplaced, or difficult to access. They are a preparation tool, not a substitute for documents that an authority requires in original form.
Create a protected digital copy of each important document before you travel. Store the files in a secure location that you can access without relying on the missing suitcase. Depending on your setup, that could mean an encrypted device folder, a trusted cloud account, or another method that protects personal information. Use a strong device passcode and avoid leaving sensitive documents in a public or shared folder.
Keep a second copy separate from your main phone. If your phone is lost, damaged, or out of battery, the only copy on that device will not help. A trusted offline device, a secure account you can access from another device, or a carefully protected paper copy can provide another route to the information.
The copy should be legible. Check that names, dates, document numbers, photographs, signatures, and relevant pages are visible. Open the files after saving them. A scan that looked complete during upload may have a missing page, blurred text, or a cut-off corner.
Organise copies so you can find them quickly. Use plain filenames that identify the document and avoid exposing unnecessary personal information in the filename. Keep a short index, such as “passport,” “visa or permit,” “insurance,” “accommodation,” “itinerary,” and “emergency contacts.” If a form or document has several pages, keep them together.
Protect the copies from casual access. Documents used for relocation can contain passport numbers, birth dates, addresses, signatures, and other sensitive information. Do not send them to a public group chat or leave them attached to an email account that you cannot secure. Delete unnecessary duplicates from devices you no longer control.
Create a small paper set as well. It can include your accommodation address, the phone number for your airline, your booking reference, and a copy of the baggage tag. Keep it in a separate personal pocket from the originals. If you carry copies of identity or travel documents, treat them as sensitive and store them securely.
Aqee can help you turn these preparations into a local-settlement checklist, with separate steps for travel, arrival, administration, housing, and the first days in your new city. The checklist can remind you to prepare copies and records before departure. It does not determine whether a particular copy will be accepted by an immigration, border, housing, or registration authority.
Retain baggage and itinerary records
Baggage records become important when you need to describe what happened and help the airline locate the bag. Keep the baggage tag, boarding pass, booking confirmation, itinerary, and any baggage receipt together.
Take a photograph of the baggage tag before you leave the check-in area. Make sure the code and identifying details are readable. If you have more than one checked bag, photograph each tag separately and label the images clearly. A photograph can be easier to retrieve than a small paper stub, especially when you are standing at a crowded service desk.
Save your booking reference and flight details offline. Your itinerary should show the relevant flight information, but do not rely on the itinerary alone to prove that a bag was accepted. Keep the baggage-tag record as a separate item.
Write down the bag’s useful identifying details before you travel. Include its colour, size, brand if known, distinctive marks, and any identifying strap or label. Avoid putting your passport number or other unnecessary sensitive information on the outside of the bag.
If the airline provides a delayed-baggage report or reference number, save it immediately. Take a screenshot, write it down, and keep any email or text message connected to it. Note the date, airport, desk or channel used, and the contact route the airline gives you. Ask what the next update will be and how you should provide a delivery address.
Use a destination address that you can actually access. If you are moving between temporary accommodation, a hostel, a hotel, a friend’s home, and a longer-term rental, clarify which address should be used for delivery. Do not guess if the delivery instructions affect whether the bag can reach you.
Keep receipts for reasonable purchases that may relate to the delay, when applicable. The airline’s policy, the relevant law, and the circumstances of the journey determine what may be covered. Do not assume that every purchase will be reimbursed. Record what you bought, why you needed it, and when you bought it.
The rules and claims process can vary. The U.S. Department of Transportation explains consumer rights and airline responsibilities for flights covered by its rules, including delayed, lost, and damaged baggage. The ICAO consumer protection guidance provides international aviation consumer-protection context, while the Montreal Convention 1999 sets out an international framework that may apply to certain international carriage claims. Check the airline’s instructions and the rules applicable to your journey rather than relying on a general internet checklist.
Use the airline’s applicable delayed-baggage route
Report the delayed bag through the route the airline provides. That may be an arrivals-desk process, an online form, an airline app, or another official contact channel. Use the instructions connected to your flight and airport.
When reporting, give the baggage-tag information accurately. Describe the bag in ordinary language and provide the delivery address and contact details requested. Keep the report reference. If the airline asks for supporting information, send only through a channel you can verify as official.
Do not leave the airport assuming the bag will arrive without reporting it. A delivery may happen later, but the airline still needs a record of the delay and a way to contact you. If the desk is closed, check the airline’s official instructions for the applicable alternative route.
Ask practical questions:
- What is the delayed-baggage report number?
- How will the airline contact you?
- Where should you check for updates?
- Which address should be used for delivery?
- What receipts or records should you keep?
- What should you do if your accommodation changes?
Keep answers and reference numbers in the same place as your itinerary records. If you speak with several representatives, record the time and channel of each contact. Clear notes reduce repetition when you are tired or moving between locations.
The U.S. Department of Transportation’s guidance on lost, delayed, or damaged baggage is useful for understanding the reporting and consumer-rights context for covered flights. It does not replace the airline’s specific process or the rules of the country where you are arriving.
Your baggage report also does not decide whether you can enter the country, begin work or study, collect a residence document, or move into accommodation. Those decisions belong to the responsible authorities and organisations. If a border, immigration, school, employer, landlord, or accommodation provider asks for a particular document, confirm directly what they require and whether a copy is acceptable.
Keep practical backups separate from entry and accommodation decisions
This separation prevents a common mistake. A copy of an accommodation booking may help you find the address or contact the host. It does not automatically prove that the accommodation meets a registration requirement. A photo of a visa may help you retrieve the document number. It does not replace the original when the responsible authority requires the original.
Prepare two short lists before departure. The first list contains items you must personally control and any questions about entry or legal status. The second contains practical arrival information such as the accommodation address, airline contact, emergency contact, baggage reference, and transport plan.
For the first list, consult the official authority responsible for your destination and travel status. The U.S. Department of State’s international travel checklist offers general planning prompts, but destination-specific requirements can change. Confirm current requirements directly before travel.
For the second list, create a version that works when your bag is missing. Include your first-night address, a phone number or messaging route, a backup payment method, and enough information to reach a safe place. Keep this information separate from the checked luggage.
Return to Marta’s situation. Her copies helped her read the accommodation address and show the baggage report details, but they did not settle every question. She still had to follow the airline’s process and confirm what the accommodation provider could accept. The difference was that she could make those calls without opening a suitcase that had not arrived.
By the time she left the arrivals hall, the practical picture was clearer. Her bag was delayed, her report number was saved, her address was available, and her original travel document remained in her personal pouch. The next task was smaller and specific: reach the accommodation, charge her phone, and check the airline update.
Use the airline’s applicable delayed-baggage route
Turn this into a dated, route-specific task: record the authority that owns the requirement, the official page checked, the evidence available, and when it must be reconfirmed. Organising a record does not establish eligibility, approval, residence, or admission.
What to do next
Before your next international move, create an Aqee local-settlement checklist. Start with the documents you must keep under personal control. Add a separate protected-copy step, a baggage-tag photograph, an offline itinerary, the airline’s delayed-baggage reporting route, and the address where you can receive the bag.
Then check each item against your actual destination and travel purpose. Confirm entry, visa, permit, registration, and accommodation requirements with the responsible official authority or organisation. Mark any item that needs an original, a certified copy, a translation, an appointment, or direct confirmation.
Keep the checklist practical enough to use at the airport. Put the original-document check before departure, the baggage-record check at check-in, the report route in your phone and on paper, and the accommodation address in a separate personal pocket.
A delayed suitcase may arrive later. Your arrival plan needs to work before it does.
Sources
- ICAO, consumer protection and baggage, checked 2026-09-24.
- ICAO, Montreal Convention 1999, checked 2026-09-24.
- U.S. Department of Transportation, lost, delayed or damaged baggage, checked 2026-09-24.
- U.S. Department of State, international travel checklist, checked 2026-09-24.
Related Aqee guide
Keep the practical follow-up in your wider move plan with Aqee’s immigration-paperwork guide.


